Tentiva Firmware
This page provides the latest Tentiva firmware binaries and detailed release notes for each supported board revision. Firmware manages on-board peripherals, clock configuration, and system initialization.
Firmware
| Board Revision | Firmware Version | Notes | Download |
|---|---|---|---|
| E | 2.1 | This update introduces programmable control of the SI5338 PHY clock generator. The reference output clock can now be configured via the PHY clock register (0x03), allowing dynamic clock setup. | Download Firmware v2.1 for Board Rev. E |
| E | 2.3 | The video clock generator (RC22504A) is now initialised and programmed: a frequency written to the video clock register takes effect, and the video clock lock bit is reported. The PHY clock lock bit is cleared as soon as a new PHY clock frequency is written and is set again only after the SI5338 has been reconfigured successfully, so the host no longer starts its PHY on a reference clock that is about to change. The status LED now breathes in the colour of the active function instead of blinking. | Download Firmware v2.3 for Board Rev. E |
Updating the Firmware
The Tentiva system controller is updated over USB with a firmware file (.uf2) from the table above.
No programming tools are needed: in update mode the board shows up on the host PC as a flash drive.
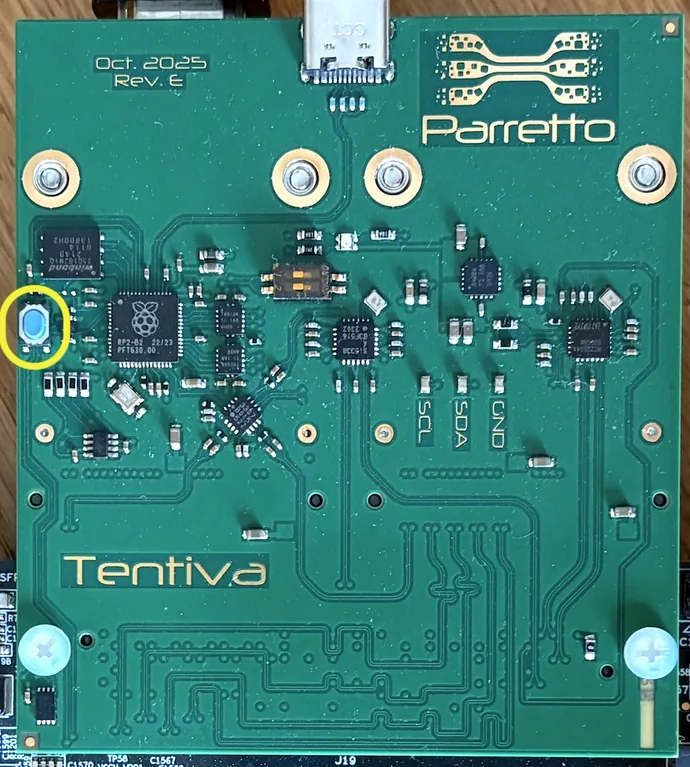
Figure 1: Tentiva board Rev. E, the flash update button is circled in yellow
- Mount the Tentiva board on the FPGA main board.
- Connect the USB cable between the Tentiva board and the host PC.
- Hold down the blue flash update button (Figure 1) while the FPGA board is powered on.
- A flash drive now appears on the host PC.
- Copy the firmware file (
.uf2) to the flash drive. - After the file has been copied, the Tentiva restarts automatically and the LED starts blinking.